2026-11-19 ·
Step-by-Step Guide to Prepping Wood Trim in Older Dayton Homes
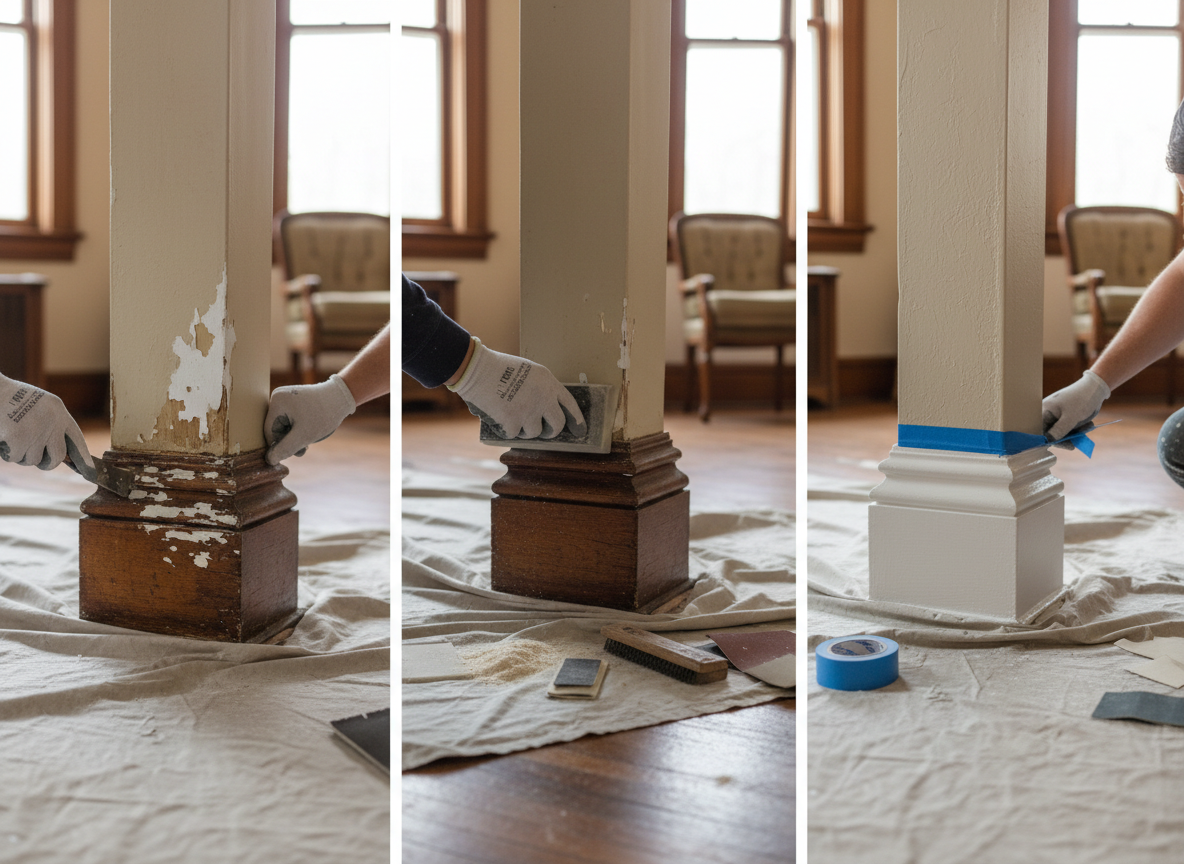
Prepping wood trim in older Dayton homes begins with inspecting trim in neighborhoods such as the Oregon District and South Park for peeling layers and loose sections, then working through cleaning, sanding, and priming before finish coats go on.
Inspecting Trim Condition
Start by examining trim around windows, doors, and baseboards. Look for cracks, bubbling, and areas where prior paint has failed due to repeated freeze-thaw cycles common in Montgomery County. If the home was built before 1978, assume older layers may contain lead paint until a test shows otherwise; a lead test kit or a certified inspector can confirm it. Document problem spots with photos to share later. This inspection shows whether the trim needs only surface prep or deeper repairs before any coating. Focus on south-facing exposures that get more sun and heat in summer, and note moisture stains near kitchens or baths that may need extra drying time.
Cleaning and Stripping Old Layers
Remove dirt, grease, and loose paint using a mild detergent solution and soft brushes, working section by section. Rinse thoroughly and allow full drying, especially after humid summer days when moisture lingers. On failing exterior trim, wet-scrape peeling spots and stop at sound layers. Where lead paint is possible, avoid dry sanding, power planing and open-flame stripping, and contain debris on plastic sheeting; the EPA's lead-safe work practices (RRP rule) apply to paid work on pre-1978 homes. Schedule exterior work during dry stretches in late spring or early fall when temperatures stay moderate, and avoid pressure washing close to delicate wood to keep water out from behind siding.
Sanding and Surface Smoothing
On trim without lead concerns, sand progressively with 120-grit then 220-grit paper to feather edges and create tooth for new coatings. Work with the grain to avoid cross scratches that show through later paint, and wipe away all dust with tack cloths after each pass. Pay extra attention to corners and profiles where old paint builds up. Older homes in Kettering or Beavercreek may have uneven trim from prior additions, so check flatness with a straightedge. Sanding removes gloss from existing finishes and levels minor imperfections without gouging the wood. Finish interior trim prep before moving outside to control dust inside living spaces.
Priming and Timing Considerations
Apply a stain-blocking primer suited to wood and any older finishes, brushing into all profiles and end grain. Allow full cure time based on the product label and current humidity. Exterior work in the Dayton area generally fits between spring and mid-fall when temperatures support drying; avoid peak afternoon heat that can make paint skin over too fast. Interior trim prep can happen year-round with good ventilation. See trim painting or exterior paint choices for Dayton freeze-thaw cycles for compatible topcoats. Soft spots that indicate rot need separate repair before primer.
Maintenance and Next Steps
After painting, check trim each spring for new peeling or cracks, especially after winter thaws. Touch up small areas promptly to protect the wood. For full interior or exterior trim work, calling (773) 389-7672 connects you with an independent local painter who can discuss the project. Pricing depends on the job and is discussed with the painter after you call.